雨林木风的系统如何安装
- 时间:2024年04月09日 07:40:00 来源:魔法猪系统重装大师官网 人气:16805


有很多小伙伴想要找到一款较为好用的电脑一键重装系统工具,帮助重装修复现有电脑系统的一些故障问题,但是自己不知道到底哪些工具好用。这里小编建议大家可用雨林木风一键重装系统软件,下面就告诉大家安装雨林木风系统教程。
工具/原料:
系统版本:Windows7系统
品牌型号:惠普星13
方法/步骤:
方法一:利用镜像文件安装
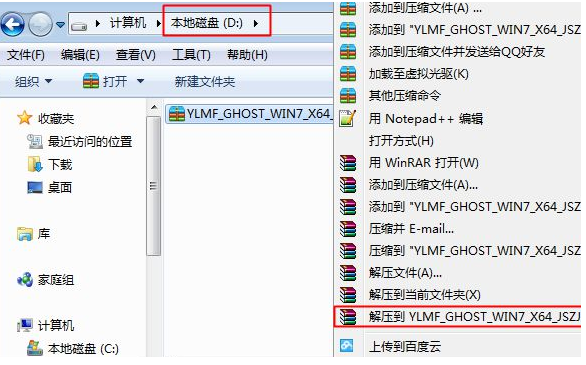
1、将下载雨林木风系统iso镜像到电脑本地磁盘中,注意不要放桌面或C盘,鼠标右键使用WinRAR等工具解压下载好的镜像文件。
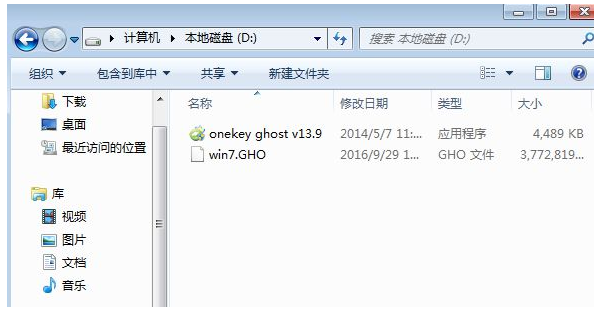
2、将win7.gho文件以及Onekey ghost工具剪切放到同一目录,比如D盘,注意不要放C盘或桌面当中。
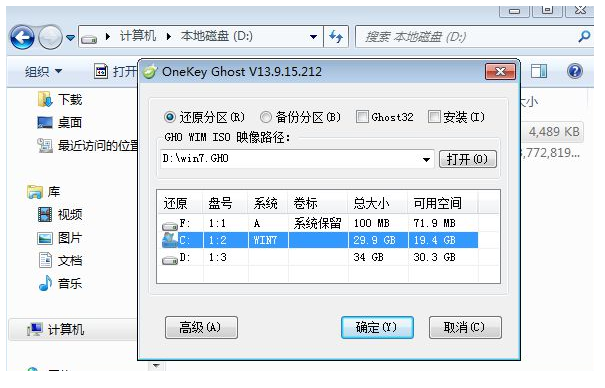
3、点击打开Onekey ghost安装工具,选择“还原分区”,GHO WIM ISO映像路径选择win7.gho文件,选择安装位置,比如C盘,或者大家可以根据磁盘容量判断要安装系统的磁盘,点击确定。
4、弹出提示框界面,确认没有重要数据之后,点击是,立即重启进行计算机还原,也就是安装雨林木风系统的过程啦。

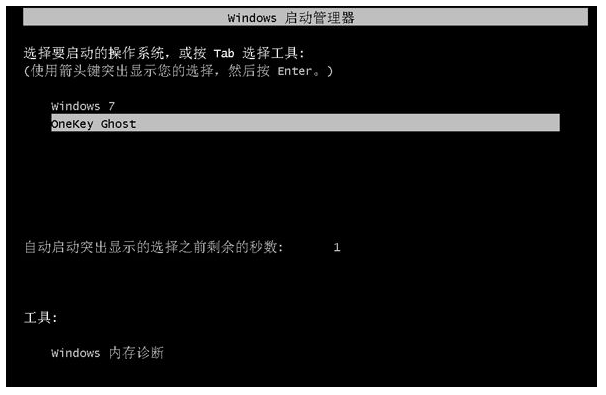
5、此时电脑会重启操作,重启电脑进入开机启动项页面时多出Onekey Ghost选项,系统会默认自动选择Onekey Ghost进入安装过程中。
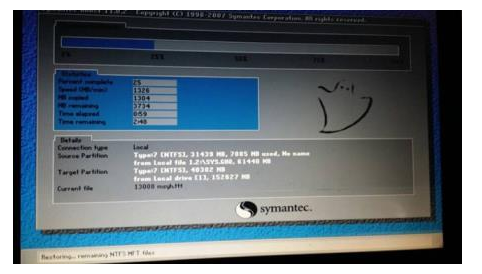
6、当电脑进入到这个界面后,执行雨林木风系统安装到C盘的操作,耐心等待进度条完成。
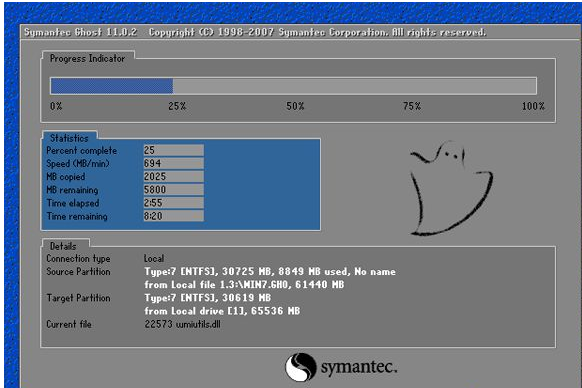
7、操作完成后,电脑此时将会自动重启,继续执行雨林木风系统驱动安装、配置以及激活过程。

8、整个安装过程电脑会有2次重启,最后重启电脑进入全新系统桌面后,雨林木风系统安装即可完成。

方法二:使用WinRAR 工具解压进行安装
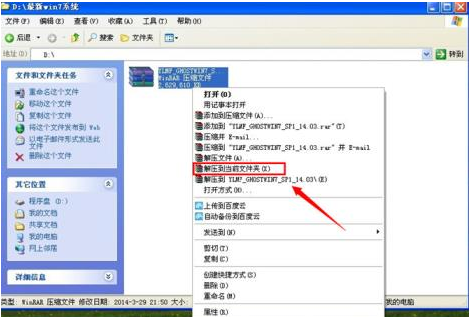
1、首先将我们下载的雨林木风系统使用WinRAR 工具进行解压。
2、点击打开 Ghost 安装器。
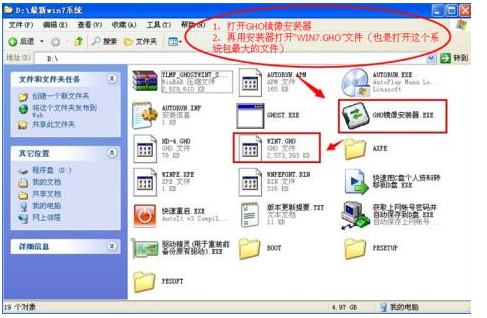
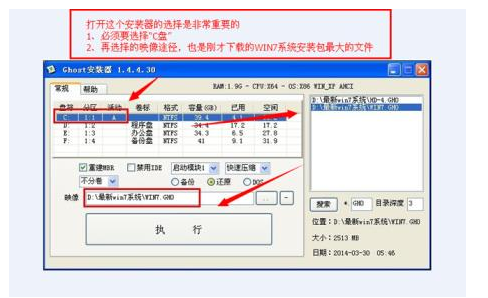
3、打开 Ghost 安装器后,然后选择目前分区为C盘,浏览找到我们解压的GHO 格式的系统镜像,开始执行还原。
4、还原完成后自动重启电脑,进入 Ghost 装机界面。
5、再次重启电脑进入到系统的部署安装界面啦。

6、等待电脑数次重启后我们的雨林木风系统就安装完成啦。

总结:
以上就是关于安装雨林木风系统教程,方法比较简单,可以利用镜像文件安装,也可以使用WinRAR 工具解压进行安装,希望大家能学会哦。更多电脑知识,尽在魔法猪官网!
雨林木风,如何安装雨林木风系统,安装雨林木风系统教程