预装win8 重装详细图文教程
- 时间:2016年10月07日 04:40:09 来源:魔法猪系统重装大师官网 人气:4046


很多人安装了win8系统之后都差点崩溃,一直在问这到底是什么鬼!大家一定很想要预装win8 重装系统吧?小编理解大家的心思,因为小编刚才就已经把win8系统重装回win7了,真的太操蛋了,一定也用不习惯!接下来小编就将自己win8系统重装的方法发出来,一起来看看下面这篇预装win8 重装详细图文教程吧!
1. 打开Windows 8的控制面板,找到“Windows 7文件恢复”选项;
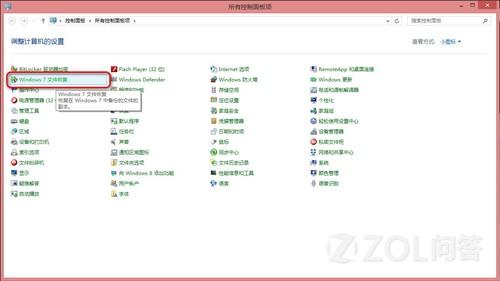
预装win8 重装详细图文教程图1
2. 双击进入后,出现如下界面:

预装win8 重装详细图文教程图2
3. 选择“创建系统映像”;
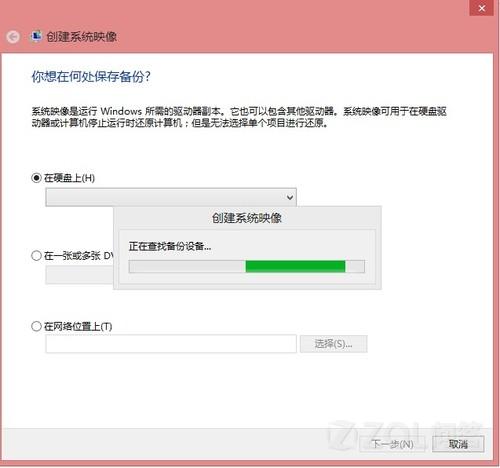
预装win8 重装详细图文教程图3
此时可以选择将Win8的系统镜像备份在移动硬盘、在一张或多张DVD上或在网络上。
根据系统的大小,若备份在光盘上需要多张光盘。
我们以备份在移动硬盘上为例,
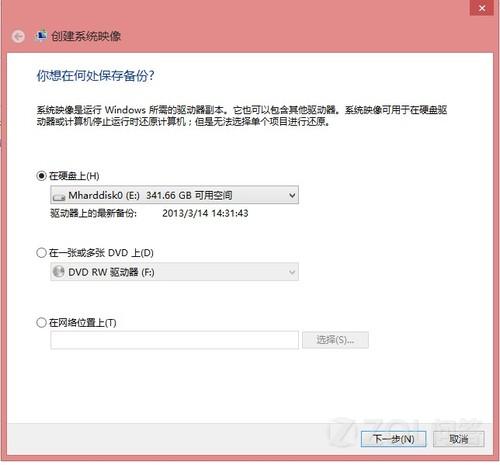
预装win8 重装详细图文教程图4
选择备份介质后,将会出现选择需要备份的分区;
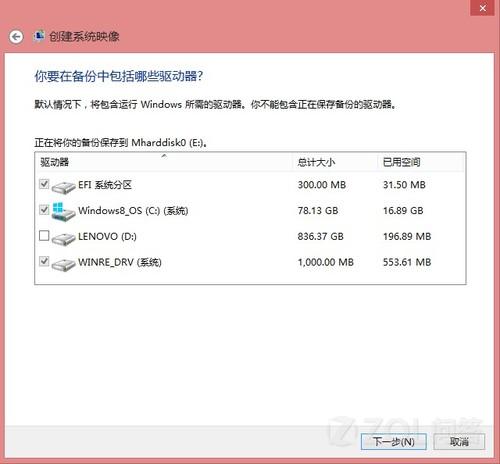
预装win8 重装详细图文教程图5
选择好需要备份的分区后,点击下一步;
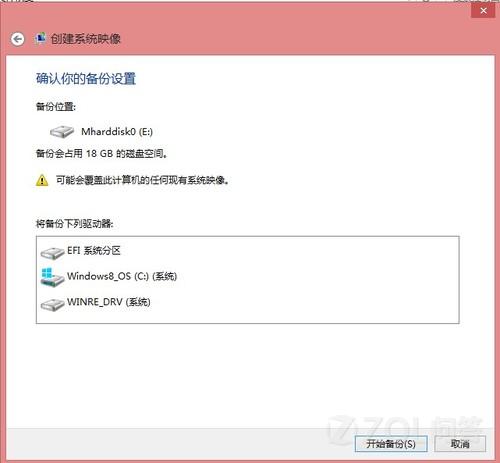
预装win8 重装详细图文教程图6
点击开始备份后进行备份;
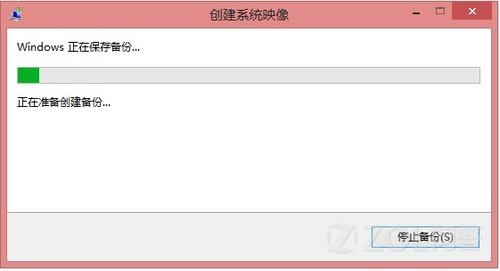
预装win8 重装详细图文教程图7
4. 备份完成后,会出现“是否创建系统修复光盘”提示。

预装win8 重装详细图文教程图8
选择"是",创建系统修复光盘;
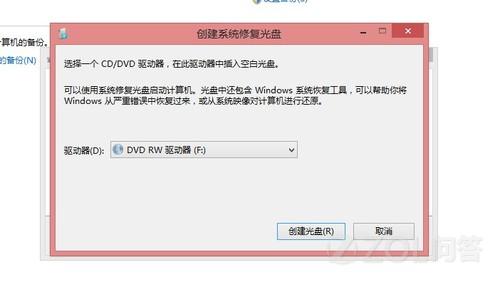
预装win8 重装详细图文教程图9
完成后,自行创建Windows 8 系统备份镜像成功。
如何恢复:
开机F12选择光驱引导,将系统修复光盘放入;
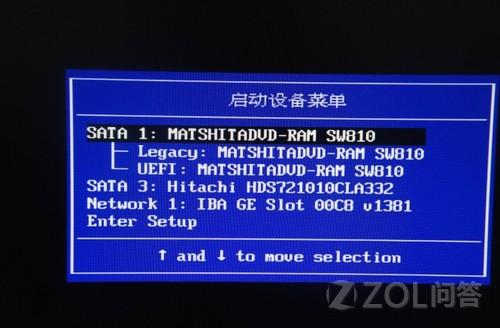
预装win8 重装详细图文教程图10
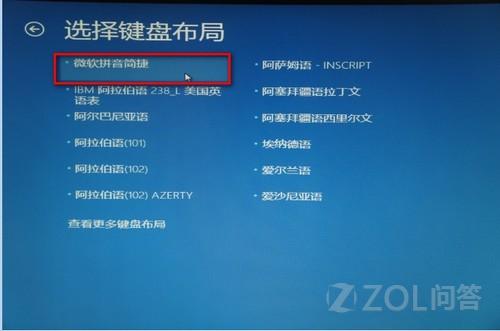
选择中文;

预装win8 重装详细图文教程图11
预装win8 重装详细图文教程图12
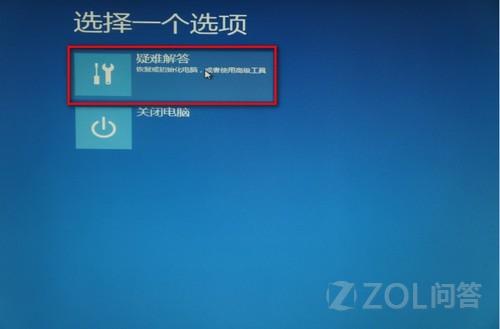
选择疑难解答;
预装win8 重装详细图文教程图13
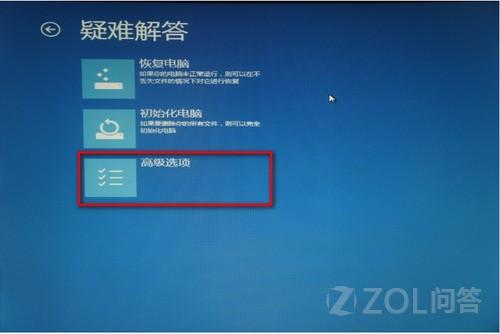
点击高级选项;
预装win8 重装详细图文教程图14
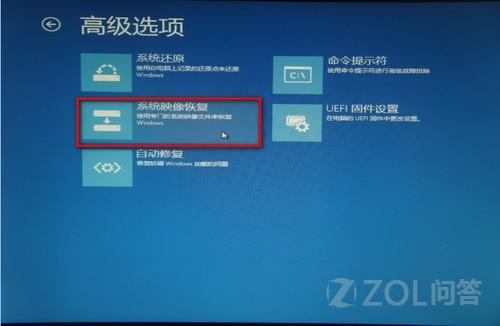
选择高级选项中的“系统映像恢复”;
预装win8 重装详细图文教程图15
选择移动硬盘中的备份,点击下一步;
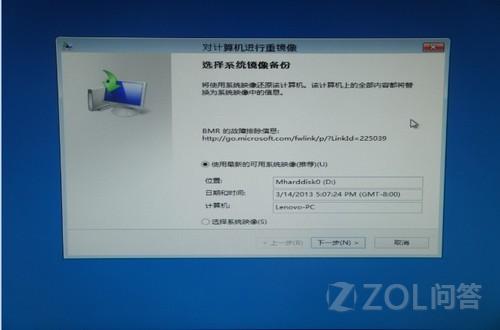
预装win8 重装详细图文教程图16
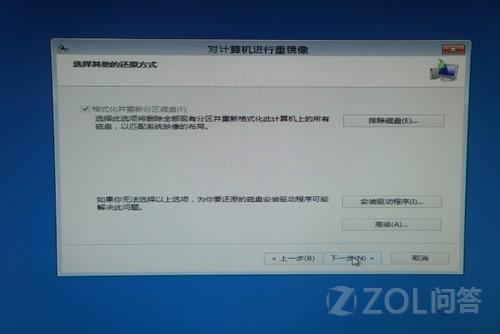
预装win8 重装详细图文教程图17
预装win8 重装详细图文教程图18
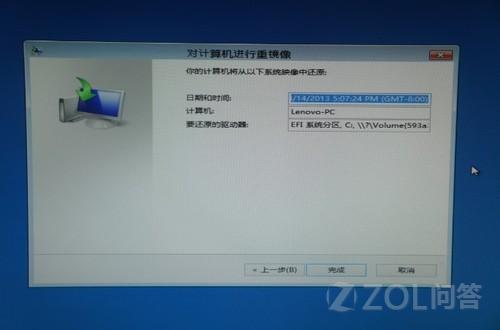
恢复前一定要备份硬盘上的数据。
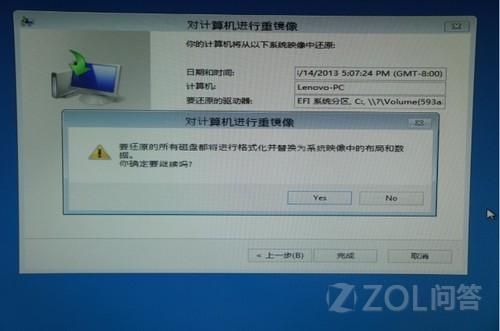
预装win8 重装详细图文教程图19
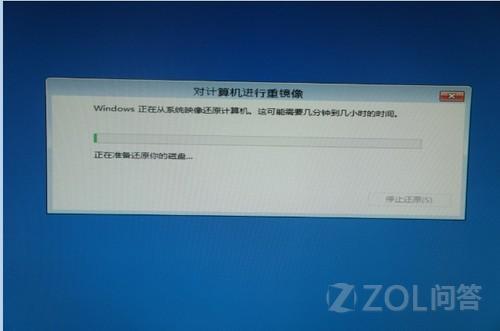
预装win8 重装详细图文教程图20
恢复完成后提示重启;
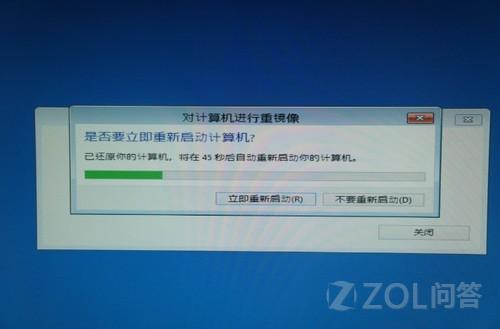
预装win8 重装详细图文教程图21
重启后,Windows 8系统恢复完成。
至此我们就已经将预装win8 重装回win7系统了,看到熟悉的操作界面,大家是否心中涌上来一股悲伤,原来陪伴我们到最后的依然是win7系统。无论现在win8、win10有多少用户量,永远都无法磨灭win7对于我们的特殊意义,这是我们在电脑路上的第一盏引路明灯!
预装win8 重装,win8系统重装