使用u盘重装系统教程
- 时间:2016年09月20日 05:35:04 来源:魔法猪系统重装大师官网 人气:2088


目前使用u盘重装系统是最多用户选择安装系统的方法,小编一直都在使用u盘重装系统。发现使用u盘安装windows系统非常的简单也很好用,很值得网友们去学习和使用。下面我就把使用u盘重装系统教程分享给大家,相信对网友们非常有帮助。
首先,你需要将系统的GHO或备份的GHO文件放到电脑或U盘中;
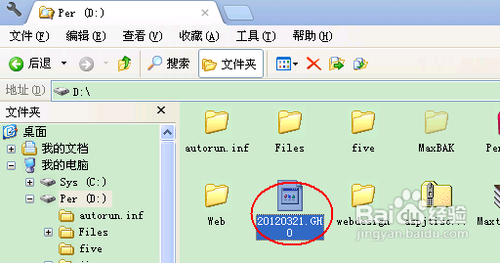
使用u盘重装系统教程图一
2然后,制作一个可以启动电脑的U盘。具体的制作方法因经验中有很多,此处略,详见参考资料;

使用u盘重装系统教程图二
3有了系统文件GHO和可启动电脑的U盘,我们再设置电脑从U盘启动。按DEL进入BIOS,将里面的“First Boot Device”选择为“USB-ZIP”:
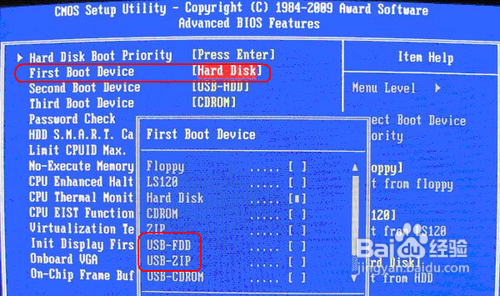
使用u盘重装系统教程图三
然后,将U盘插入电脑,由于已经设置从U盘启动,所以开机会自动从U盘启动:
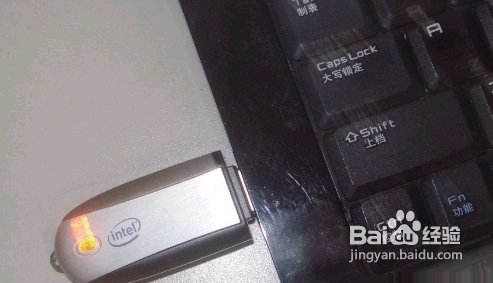
使用u盘重装系统教程图四
进入U盘界面,我们选择第一个Windows PE即可进入U盘PE系统:
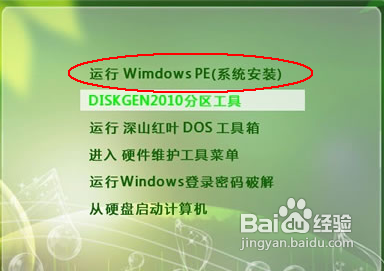
使用u盘重装系统教程图五
进入U盘PE系统后,启动GHOST程序:
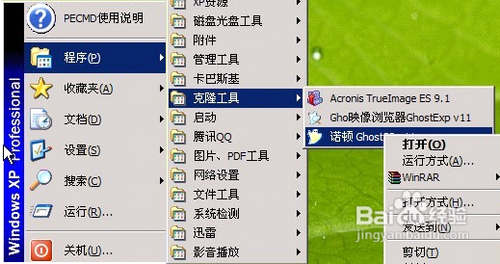
使用u盘重装系统教程图六
选择“Local”,再选择“Paritition”,再选择“From Image”:
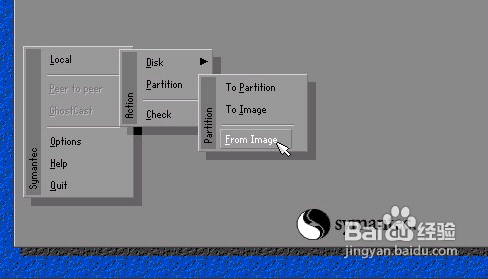
使用u盘重装系统教程图七
然后,按键盘上的Tab跳格键找到我们的GHO文件,再选择“Open”:
使用u盘重装系统教程图八
然后在接下来的窗口中选择要安装系统的硬盘:
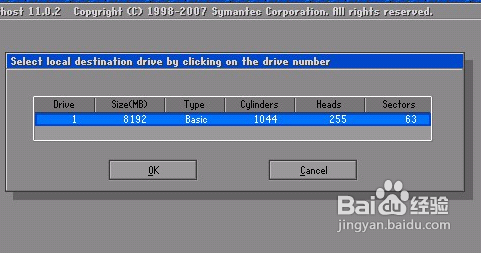
使用u盘重装系统教程图九
接下来就是选择要安装系统的分区了,选好后按“OK”键继续下一步:
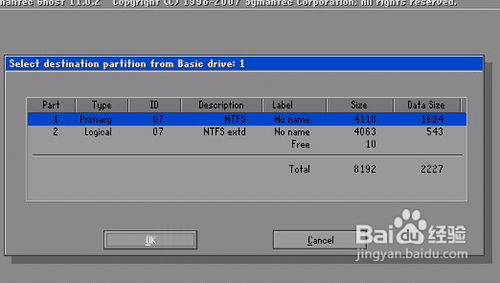
使用u盘重装系统教程图十
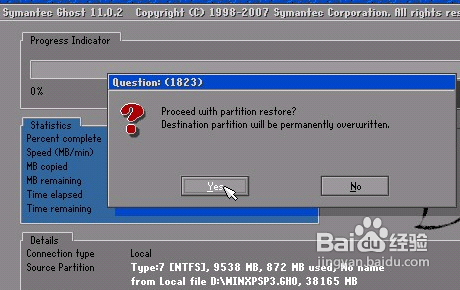
接着会弹出询问是否要还原到这个分区的确认对话框,选择“Yes”即:

使用u盘重装系统教程图十一
好了,下面开始正式的安装系统了,有详细的进度条显示:
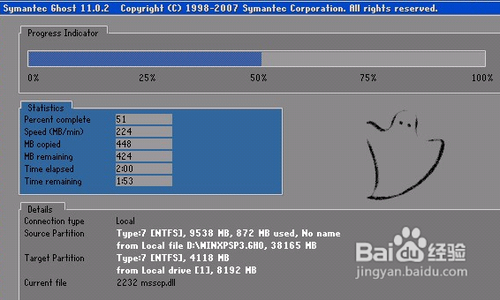
使用u盘重装系统教程图十二
进度条进行到100%时,安装结束,会弹出一完成的对话框,选择“Reset Computer”重启电脑即可:怎么重装win7系统?安装windows7系统就是这么简单。
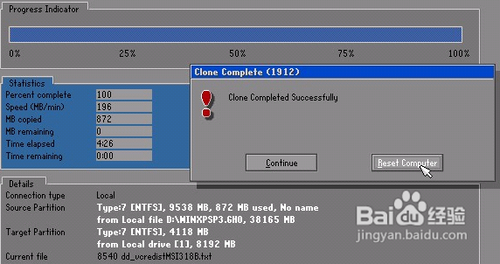
使用u盘重装系统教程图十三
以上的全部内容就是小编为网友们带来的使用u盘重装系统教程,其实使用u盘安装系统真的非常简单,所以网友们不要太担心,大家只要按照上面教程提供的步骤学习的话。一定可以学会使用u盘安装系统的。毕竟网友们都是非常聪明可爱的。我们下篇教程再见。
u盘重装系统,使用u盘重装系统